Category: Swapping


The Mystery Project


We all know I’m crazy, right?

Here’s just one example – NaNoWriMo started on November 1st. About a week before NaNoWriMo started I was cruising through the swaps over on Swap-Bot – just looking – when I noticed an unusual swap called “Geeky Crafts!”

So of course I clicked on it to read the description.

The swap was this – we had to send a handmade item to our partner that reflected one of their geeky passions. I wasn’t really planning on signing up for a swap, but as I was really intrigued by it, I signed up.

For a major project.

Six days before NaNoWriMo started.

Again, crazy.

After partners were assigned I scrolled through my partner’s profile looking for ideas, and discovered that my partner Shadowspun likes Batman.

Who doesn't?

Among the many crafts listed on her profile, my partner mentioned that while she does appliqué she has never understood patchwork. So I got to thinking about patchwork, and Batman, and crafting, and doing doodles, until I thought of something interesting.

I did a pixel drawing of the Batman logo and thought – Hey, I could make that out of fabric and turn it into a tote bag!

So I sat down and figured out how big I needed the squares to be, how much fabric I would need of each color, that sort of thing.

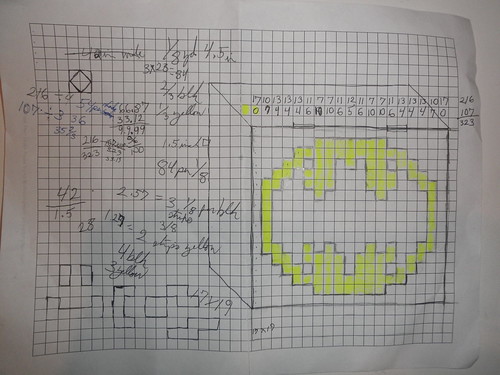
Bring forth the math!

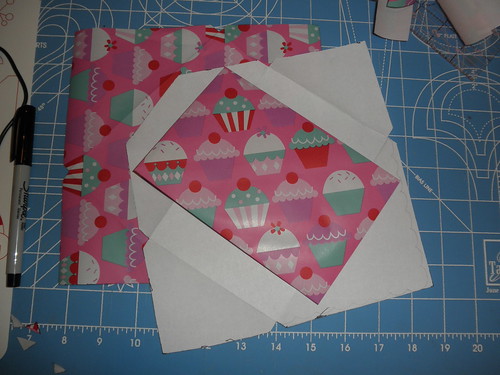
I wanted it to look like a charm quilt, with a lot of different shades, so I bought four shades of black and three yellows.
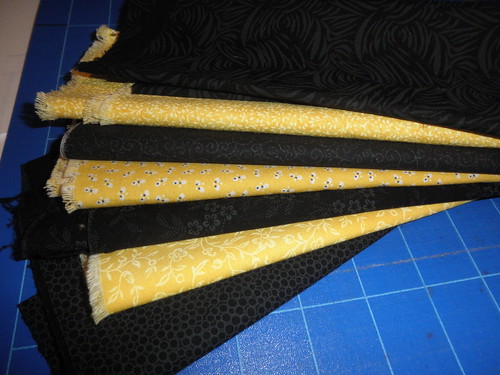
Ooh, fancy.

I had settled on 1-inch squares, with added seam allowance each one was 1 1/2 inches. The piece was 17 X 19 so I had to cut out 323 tiny little squares.

That's a lot of tiny little squares.

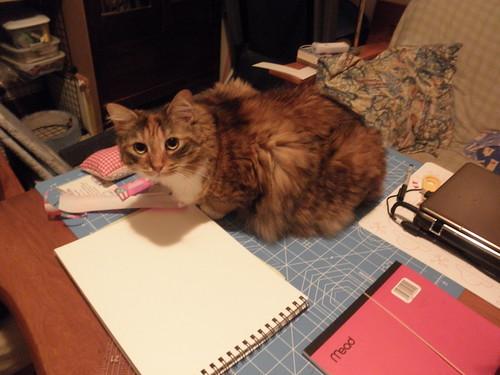
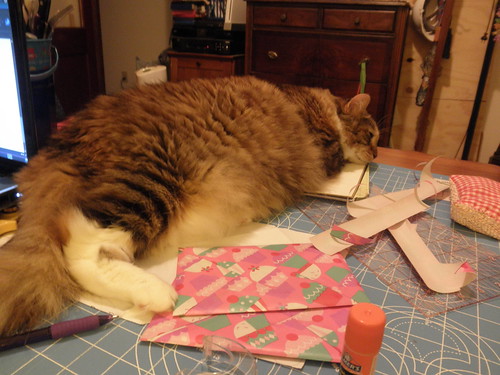
And you just know anytime I try to do something like this, I end up with lots of “help”.

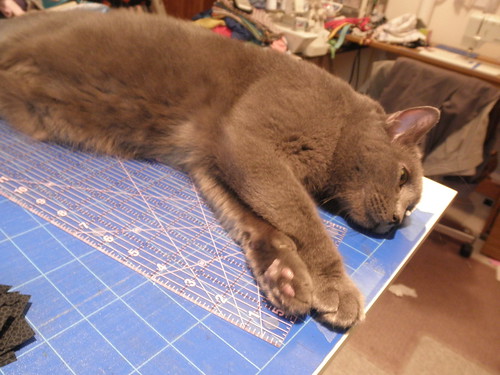
The very helpful Simon.

The extremely helpful Firefly.

And my ever-vigilant sewing buddy, Fearless.

Pretty much every other step was “Remove cat(s) from crafting surface.” This was especially fun when it came to laying out all the pieces – Fearless with her mile-long feathery tail was lots of fun.

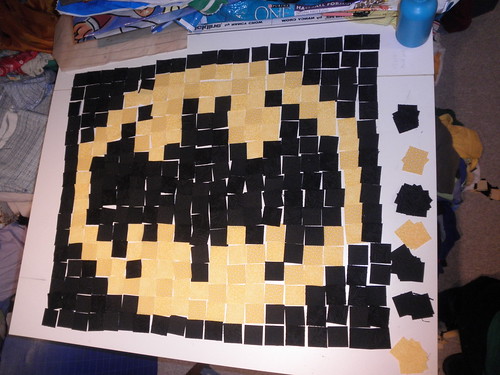
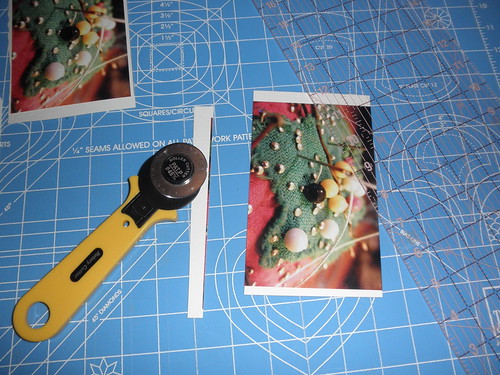
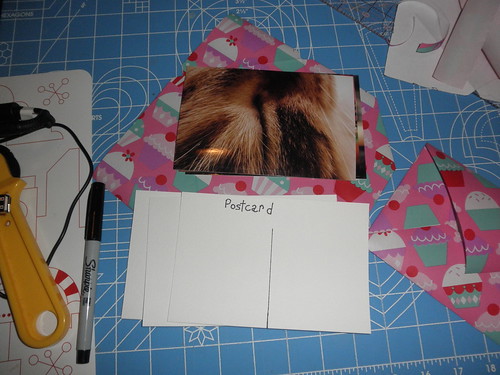
Hence the reason for the spray bottle at the top right.

The basic idea is simple – sew together in pairs, then quartets, then groups of eight, etc … larger and larger until all the tiny little pieces are sewn together in the right order.

PB050112.JPG

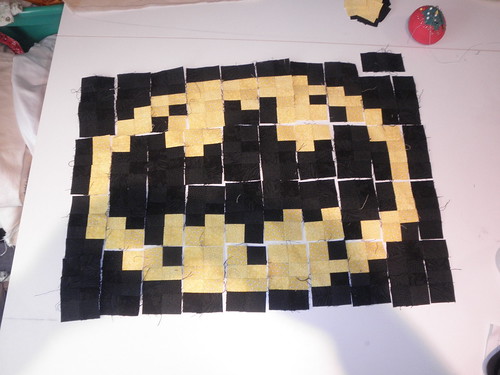
Progress halfway through, it's already much smaller than when all the blocks were laid out individually.

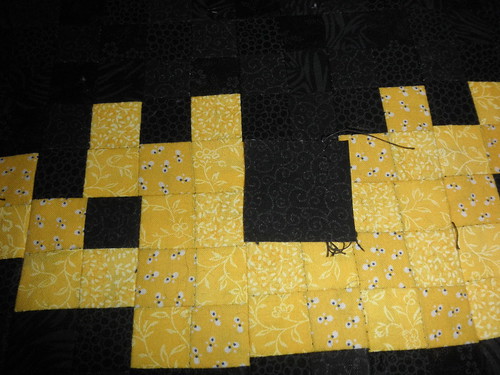
One of the cut squares on top of the finished piece.

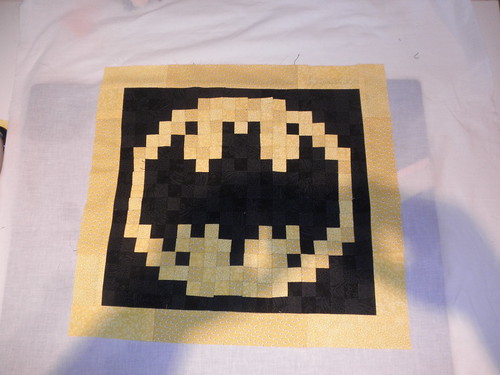
Voila! The finished logo.

Of course, once the logo was finished, I still had to make the tote bag. That part was pretty fast, since I’ve made dozens of tote bags, but it still took a while.

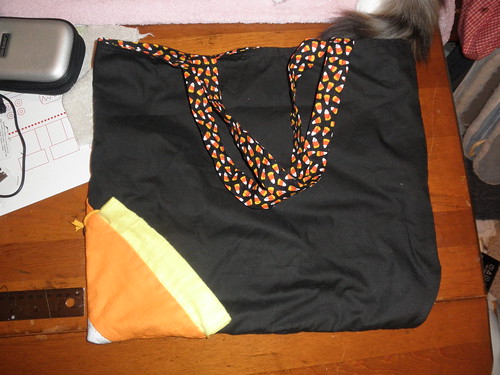
It looked much better once the border was on. You can't really tell because the colors are a bit washed out, but the yellow is made of patchwork pieces of the yellow.

I did a bit of quilting to the logo so it would be stable if it got washed – all the seam allowances made it pretty stiff so I just used a piece of plain white muslin instead of using any batting –  and sewed a bag and liner.

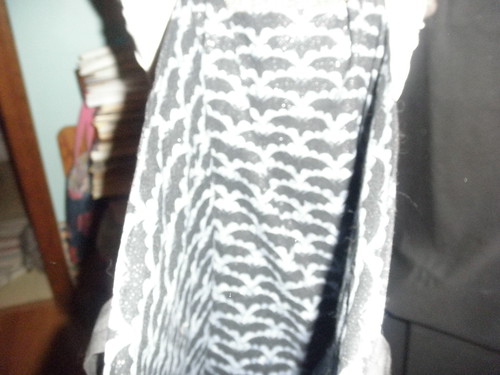
For the lining I used a sparkly bat Halloween print.

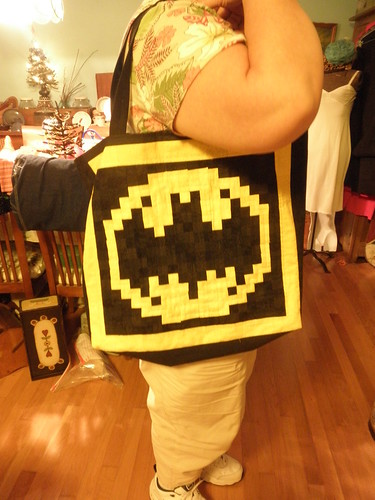
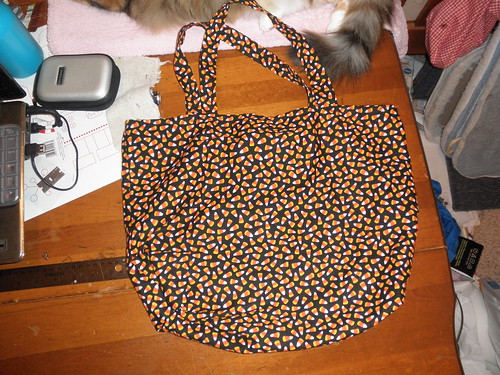
The finished bag, modeled by Mother Dearest.

SOme of the seams didn’t line up perfectly and if I had more time I would have torn the stitching out a couple of times and redone it, but I was on a tight schedule and didn’t really have time for do-overs. It galls me to send out something that is less than perfect, but my partner left me a wonderful note that she loves the bag, all the more so because she doesn’t do any patchwork so it isn’t something she would ever have done, so I guess it was okay. I can still see every wonky line though.

It was a hell of a lot of work, and if I had known how long it would take I might have chosen something else to make, but it turned out so good I didn’t want to send it. I have plans to make another for myself once NaNoWriMo is over.

It’s In The Bag


I was in a homemade tote bag swap this week – we had to send a Halloween-themed tote bag.

And what’s more Halloween than candy corn?

Lots of stuff, but I already had candy corn fabric. So I made a candy corn tote bag.

Fearless helped. A lot.

I had a little less than half a yard of the candy corn material when I was done and I have been kicking around an idea for a while that I wanted to try. Since the swap was just for one bag and I had already made that, I figured I could play a bit.

After fiddling with some white, yellow and orange flannel and the fabric, I had something similar to what was in my head.

It's a tote bag! (You'll notice Fearless hasn't moved.)

And after quite a bit of stuffing …

Candy corn!

I based it on the little strawberry bag I have, I had to make the corner pocket bigger to accommodate the thicker fabric and bigger bag. Compressed down it was about the size of an apple, so still fairly compact.

Now I want to make one for myself – with a wider white tip and more yellow so it looks more like a real candy corn. I need to get more candy corn fabric, though – I used the last bit to line the candy corn bag.

Fearless can't wait. She LOVES to help.

It’s A Kitty!


Today we take a peek inside the brain of Ghostie. Be sure to buckle in and keep your hands and legs inside the car at all times.

I consider myself an average artist – I can draw things reasonably well and know how to paint a bit. Mother Dearest and GhostSister are much more talented, compared to them I’m that kid in the back of the class whom everyone suspects eats the paste when no one is looking. The Things and GhostBoy show signs of having a love of art, they all draw remarkably well for their ages – GhostBoy can do some very nice work in the manga style.

I could probably improve my skills with a class or three, but I don’t have the patience for that. So I doodle and learn from my mistakes.

I made an ATC for a swap recently that was a bit different from ones I normally make. It was for a “pick one” forum swap – the person listed several themes she would like made into an ATC, I picked one and posted my own list of themes (I have not received my ATC yet) One of this swapper’s themes was Art Deco, something I’m slightly interested in but not a subject I have done a lot of sketches on. Since I like a challenge, I chose to make her an Art Deco card. I checked out her profile to see if there was something listed under her likes that would inspire me, which is when I noticed that she liked cats.

My brain, she started working.

Art Deco, like it’s predecessor Art Nouveau, has a lot of flowing, asymmetrical shapes with an organic feel. It has a pretty lush appearance and I find it quite beautiful, but I’ve never been brave enough to try it for myself. Since this was for someone else though, I felt compelled to try my best.

I’ve noticed that a lot recently – when I sign up for these different swaps, I’m more likely to try things I would never have tried just for myself in an effort to please a total stranger I will never meet. Odd.

So I start doodling and trying out different things. I do a Google Search for Art Deco cats but don’t really see anything I like until I spotted a set of bookends.

These.

I liked the arc the cat’s body made and I got to thinking about cats clawing things and the flowing shapes of Art Deco, which led (eventually) to this sketch.

Probably the tenth version of this particular design.

I had the hardest damned time with that head. Every version I did either looked like a squirrel or a dog or was the wrong size for the body. The tail was also problematic – too big and squirrel-like. I finally took it to Mother Dearest and she gave me a few suggestions that eventually led to this version, which I’m quite happy with.

Final version, colored in with India ink and watercolors. Lots of little lines.

Music to My … Mail?


I went yard sale-ing with Mother Dearest on Saturday.

We were winding up – it was nearly noon and getting late for sales – when we spotted a sign for a church thrift store. We didn’t have any other prospects in the area, so we went.

It was a tiny place, about the size of a large bathroom, but there was an attached garage-like area where there were boxes of old books stacked up. I saw something familiar in one of the boxes – booklets of sheet music.

Score!

I love old sheet music – these books were from the late Sixties to the mid Seventies, so they are considered vintage – because of the paper. Old sheet-music paper has a higher rag content – it’s much thicker and stronger than modern paper. That makes it perfect for envelopes.

Sheet music was made sturdy, to hold up to repeated use, so it makes beautiful envelopes that are very sturdy. The stuff I got – at three booklets for a dollar! – is not very valuable as music since there’s nothing really rare or special about them They’re really worn around the edges and the covers are torn and stained, but the centers of each page are still sound. Some of the pages have annotations in red pencil or pen, which ruins their value historically but I think it makes them more interesting visually.

Seen here under my most recent ATC, which is on its way to America's Hat.

I’m a very happy Ghostie.

I’ve had several of my swap partners comment on my envelopes, a couple even wanted to know where I bought them. They seemed surprised when I told them that I had made them myself. It’s not like it’s very hard – a little cutting, a little glue or tape and boom! You’re done.

Why buy something when you can make it yourself?

Beep-Boop!


I finished my Robot ATCs and Mother Dearest finally gave me back my camera, so here they are!

The inked but unpainted cards - I actually started painting one before I realized I had forgotten to take the picture.

I doodled a bunch of cute little robots on a piece of scrap paper, and then picked the best ones to turn into cards. I lightly drew each one in pencil and then got out my teeny-tiny liner brush and a bottle of India ink. I did not use a pen at all to make these – it’s all brushwork.

And now – close-ups!


I decided to use a combination of watercolors and color pencil to color them in – the robots are done in watercolor and the backgrounds are scribbled in with pencil.

I'm happy with the way they turned out.

I was only supposed to send one card to my partner, but I’m sending all four. I wouldn’t want to break up the band!

Now that that’s done, I’ve got to go draw an Art Deco card for another partner. More about that one later.

Spritely


I was vaguely aware of bead sprites, I remember the little plastic beads you fuse together with an iron from when I was a kid but I had not really looked into it until I received my ATC from my swap partner SerenaAzureth for the No Paper Allowed swap.

This card is only 3.5 X 2.5 inches and about 1/16 of an inch thick

When I opened the envelope it came in and saw it, I couldn’t figure what it was made of. My first thought was polymer clay, but it didn’t quite look or feel like it. So I checked my swap partner’s profile and she had mentioned that most of her ATCs were bead sprites.There was also a linky to her DeviantArt page.

Holy crappity-crap.

She’s really super-talented – I am supremely jealous of whomever got the TARDIS card. I don’t think I’d have the paitence to deal with all those tiny pieces of plastic.

I started nosing around DA to see if there were more of these bead sprite things out there, and all I can say is “Damn.”

There are some really beautiful works of art out there – made entirely out of tiny pieces of melted plastic.

Want!

Most of the sprites I’ve found have been of fairly nerdy subjects – characters from cartoons, comic books, and video games for the most part. One fella in particular, DrOctoroc, has some incredibly detailed models. Some are even 3D!

WANT!!!


Squiggles Everywhere


I almost forgot to write a post for today – I usually do them the day before but most of my Sunday was spent doing this;

That's a long line.

I’m doing a decorated envelope swap and decided to do a continuous line drawing – that’s one very long line wrapped back onto itself to make a single shape. The blank spaces are for the address, return address, and stamp.

After several hours of coloring tiny curvy spaces, I’m beginning to see those squiggles everywhere I look.

So ... Many ... Curves ...

Clearly Art


(For those who aren’t interested in crafty stuff, feel free to stroll on over to the Library of the Damned for my most recent attempt at humor.)


I recently signed up for an ATC swap that had an added twist – we couldn’t use paper.

An ATC is an Artist Trading Card – they are tiny works of art made from different mediums that are roughly the size of baseball cards. (2.5 inches by 3.5 inches)

ATC blanks, the undecorated cards, are usually cut out of paper and then embellished with paint or ink or whatever the artist wishes. Without paper I had to think of something else to serve as a blank. Luckily I have a big box of overhead transparencies!

It is very hard to photograph something made of a clear shiny material.

Since the plastic was so thin, I decided to stack several together. That got me thinking about layered designs and, after several attempts, I settled on this card – it’s overlapping layers of leaves done in tiny dots. Many, many tiny dots.

Lots of little dots.

Here you can see the individual layers, the two background pieces, and the clear envelope that holds them all together. I colored the backgrounds with different colors of sheer nail polish – they sparkle and shine and have a remarkable depth that a picture just can’t convey.

I didn’t glue the layers together, static electricity held them together pretty well and without glue the layers could be repositioned in different sequences to make different patterns. I made an envelope out of the same transparency so my partner could see the card and there would be no danger of the different layers getting lost.

A close-up, it looks much better in person.

  In hindsight, I do wish I had added more leaves and used a different color besides yellow. It didn’t show up very well.

I was just tired of making dots.


Halloween Conundrum


Most people who do various crafts will know that you don’t wait until the holiday season in question to start doing whatever it is you are going to do for that particular holiday. If you make your own Christmas cards, you might start making them in September or October, that sort of thing.

Swapping is very similar – there is usually a long lead time to allow people to sign up, to get partners assigned, to actually make or buy the items, that sort of thing. It all takes time. You can trim this time by having it be sender’s choice – the swap has a theme and you know what it is ahead of time so you can go ahead and find or make what you’re going to send before partners are assigned. But there are some that are partner-specific and you have to wait until you get assigned a partner before you can do anything.

I will eventually get to a point, I swear.

I am thinking about signing up for a large swap, The Thirteen Days of Halloween. The idea is simple – you send a large package containing thirteen individually wrapped and numbered small gifts with a Halloween theme. You open one each day for the thirteen days leading up to Halloween. (You could open them all at once, but that’s not the point.) You normally see swaps like around different holidays – Christmas is the big one, there are usually several big Advent Calender swaps during the Christmas season that you have to sign up for as early as October.

I love Halloween – if it was socially acceptable for a thirty-mumble year old woman to do so, I would dress up (possibly as Batgirl) and go trick-or-treating every year. I collect witches, bats, etc all year-long. The Nightmare Before Christmas  is my favorite movie.

I really want to sign up for this swap, but I’ve had a lot of bad experiences with big swaps in the past. I’ve had swaps where I put in a lot of time and effort, really worked extra hard, and either got back utter crap or absolutely nothing. Having been burned, I’m hesitating on whether I should do it.

There are two versions; one where every gift has to be something hand-made ( like a bookmark, an ATC, or other small craft) and one where the gifts can be a mixture of hand-made and store-bought. I can sign up for either one, both, or neither. I really want to sign up for both, I can probably think of thirteen (or even twenty-six) different Halloween things while standing on my head, but I’m just not sure. I have until the 23rd to decide, so I’m mulling things over.

Cupcakes By Mail


I’ve got my picture postcards all made and they are going out in the mail today.

Here’s how I made my own postcards.

First I ordered 4 X 6 prints of my desired photos from Walgreens. You can order them online and then pick them up at a nearby store, which saves postage if you don’t have the means to print them yourself. I placed my order Tuesday morning before leaving home for work and picked them up at lunchtime, which is a pretty quick turn-around.

Once I got them home, I glued them to stiff watercolor paper with ModgePodge. Plain cardstock or any stiff paper will do just as well.

After they dried for a day, I trimmed off the excess paper with my paper-rotary cutter.

Slice and dice.

I drew a line down the center of the back of each card and wrote the word “Postcard” at the top. On one of the cards in each lot I wrote a little note to my swap partner.

Like so.

That was it for the postcard portion of the evening.

Since I was sending more than one and did not want to pay postage on each one separately, I made a couple of envelopes.

A finished envelope, my template, and a freshly cut out envelope.

These envelopes are made of wrapping paper I found at Target in the dollar section, it’s really thin but so very adorable!

The whole process didn’t take too long – it did take longer than I had planned but that was due the “help” of a certain giant fluffy cat.

I'm the ... postal inspector. Yeah, that's it!

I think Fearless was convinced that I had invented a brand-new game just for her called “Sleep on Momma’s Postcards.” Every five minutes I had to pick her up off the table and put her on the floor or futon.

She tried her damnedest though.